

Use the links below to navigate between the phases of my build!
If you live or travel in cold climates in a van or RV, winterizing your water system is crucial. Last year, I assumed that running my pump would be enough to drain my Bosch electric water heater. Spoiler: it wasn’t. When spring arrived, I refilled my van’s water system, turned the pump on, and the heater instantly exploded, flooding the van. Lesson learned.
This year I'm spending a few months in Colorado, so I decided to follow proper winterizing steps. My Bosch heater is hard-piped with rigid lines, making it impossible to remove or flip.
Below is the exact method I used to drain and winterize a Bosch 5 gallon electric water heater without removing it. I couldn't find any good guides on this so I created my own!
I’m not a professional. This is simply how I successfully drained my system. Perform these steps at your own risk.
* Disclaimer: This page may contain various affiliate links that provide a small kickback to me, at no additional cost to you.
Instructions from maintenance manual here
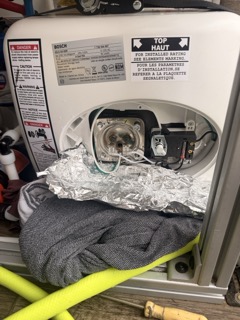
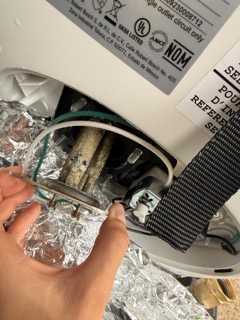
Because the opening is awkward and the water flow unpredictable, I created a small gutter using shaped aluminum foil.
Place towels underneath the unit—water will start to appear as soon as you loosen screws in the next step.
Position the foil gutter on top of towels and so it directs water out of the van.
The metal plate is held in place with four bolts. Behind it is the water tank itself.
Let the water drain fully until the flow slows to a trickle.
Once the flow has slowed:
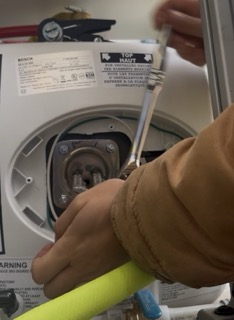
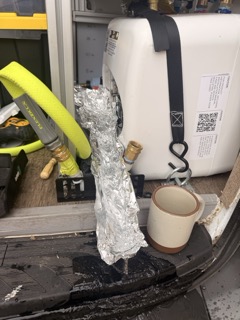
There will still be water sitting at the bottom. Use a small, flexible hose to siphon the remaining water into your container. Since I didn't take out the heating element it took some faffing around to actually get the hose in the right position to drain the water. Had to do it a few times before it looked like the tank was fully empty.
While everything is open:
Bosch recommends inspection during maintenance, so this is a convenient time to do it.
As you can see mine is pretty gross, but I didn't replace it because I didn't have the time.
Ta-da! That should be it. While admittedly I haven't tested this AFTER winter yet, I have high confidence (and even higher hopes) that I won't flood my van again and need to replace my heater in the spring.
Click on the image above to go to the full data base.
The Notion Board is my brain-dump database. I've been keeping meticulous track of every purchase, complete with receipts.
Use the links below to navigate between the phases of my build!
.svg)
.svg)